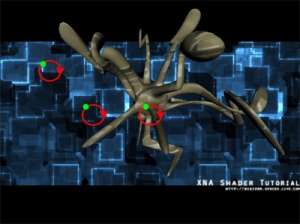
In this case, we are rendering a scene to a texture and applying a wiggling effect to the scene. This makes the scene look like it’s "underwater".
float fTimer;
This timer will be set from the application, and will be used in our sin/cos movment of every texture coordinate, making them move around! 🙂
We also need the ColorMap texture for the shader, containing our scene and is updated every frame.
sampler ColorMapSampler : register(s0);
Now, we got what we need for our shader! Lets take a look at our short pixel shader function:
float4 PixelShader(float2 Tex: TEXCOORD0) : COLOR
{
Tex.x += sin(fTimer+Tex.x*10)*0.01f;
Tex.y += cos(fTimer+Tex.y*10)*0.01f;
float4 Color = tex2D(ColorMapSampler, Tex);
return Color;
}
This shader simply takes the X and Y component of the current Texture Coordinate, Tex, and moves them around in a circle. the fTimer+Tex.x in the sin loop is there so the coordinate moves based on the timer, pluss the Tex.x to make the circle different for every step in the X-direction. We do the same thing with Y.
If we had used sin(fTimer)/cos(fTimer) in stead of including Tex.x/Tex.y, all texture coordinates would have been moving in the exact same circles. You should try this, and play around with the parameters so you fully understand why we are doing this.
Finally, we will need our technique, named PostProcess:
technique PostProcess
{
pass P0
{
PixelShader = compile ps_2_0 PixelShader();
}
}
Implementing the shader
It’s pretty simple to add our shader to whatever scene we want! Just render the scene into a texture:
RenderTarget2D
renderTarget;renderTarget = new RenderTarget2D(graphics.GraphicsDevice, pp.BackBufferWidth, pp.BackBufferHeight, 1, graphics.GraphicsDevice.DisplayMode.Format);
graphics.GraphicsDevice.SetRenderTarget(0, renderTarget);
// Render our scene
graphics.GraphicsDevice.SetRenderTarget(0, null);
SceneTexture = renderTarget.GetTexture();
Where SceneTexture is a Texture2D object.
Now, we must display the scenetexture, and applying the post process effect:
spriteBatch.Begin(SpriteBlendMode.None, SpriteSortMode.Immediate, SaveStateMode.SaveState);
{
// Apply the post process shader
effectPostOutline.Begin();
{
effectPostOutline.CurrentTechnique.Passes[0].Begin();
{
effectPostOutline.Parameters["fTimer"].SetValue(m_Timer);
spriteBatch.Draw(SceneTexture, new Rectangle(0, 0, 800, 600), Color.White);
effectPostOutline.CurrentTechnique.Passes[0].End();
}
}
effectPostOutline.End();
}
spriteBatch.End();
And thats it! We got a very simple, but pretty cool post process effect. You should play around with the shader so implement your own post process effects. Try editing the circle each texture coordinate moves in! U guess you can come up with a quite cool distortion effect 😉
NOTE:
You might have noticed that I have not used effect.commitChanges(); in this code. If you are rendering many objects using this shader, you should add this code in the pass.Begin() part so the changed will get affected in the current pass, and not in the next pass. This should be done if you set any shader paramteres inside the pass.
Good luck!
YouTube – XNA Shader programming, Tutorial 9 – Wiggle post process shading


Very useful tutorial.Thanx!